
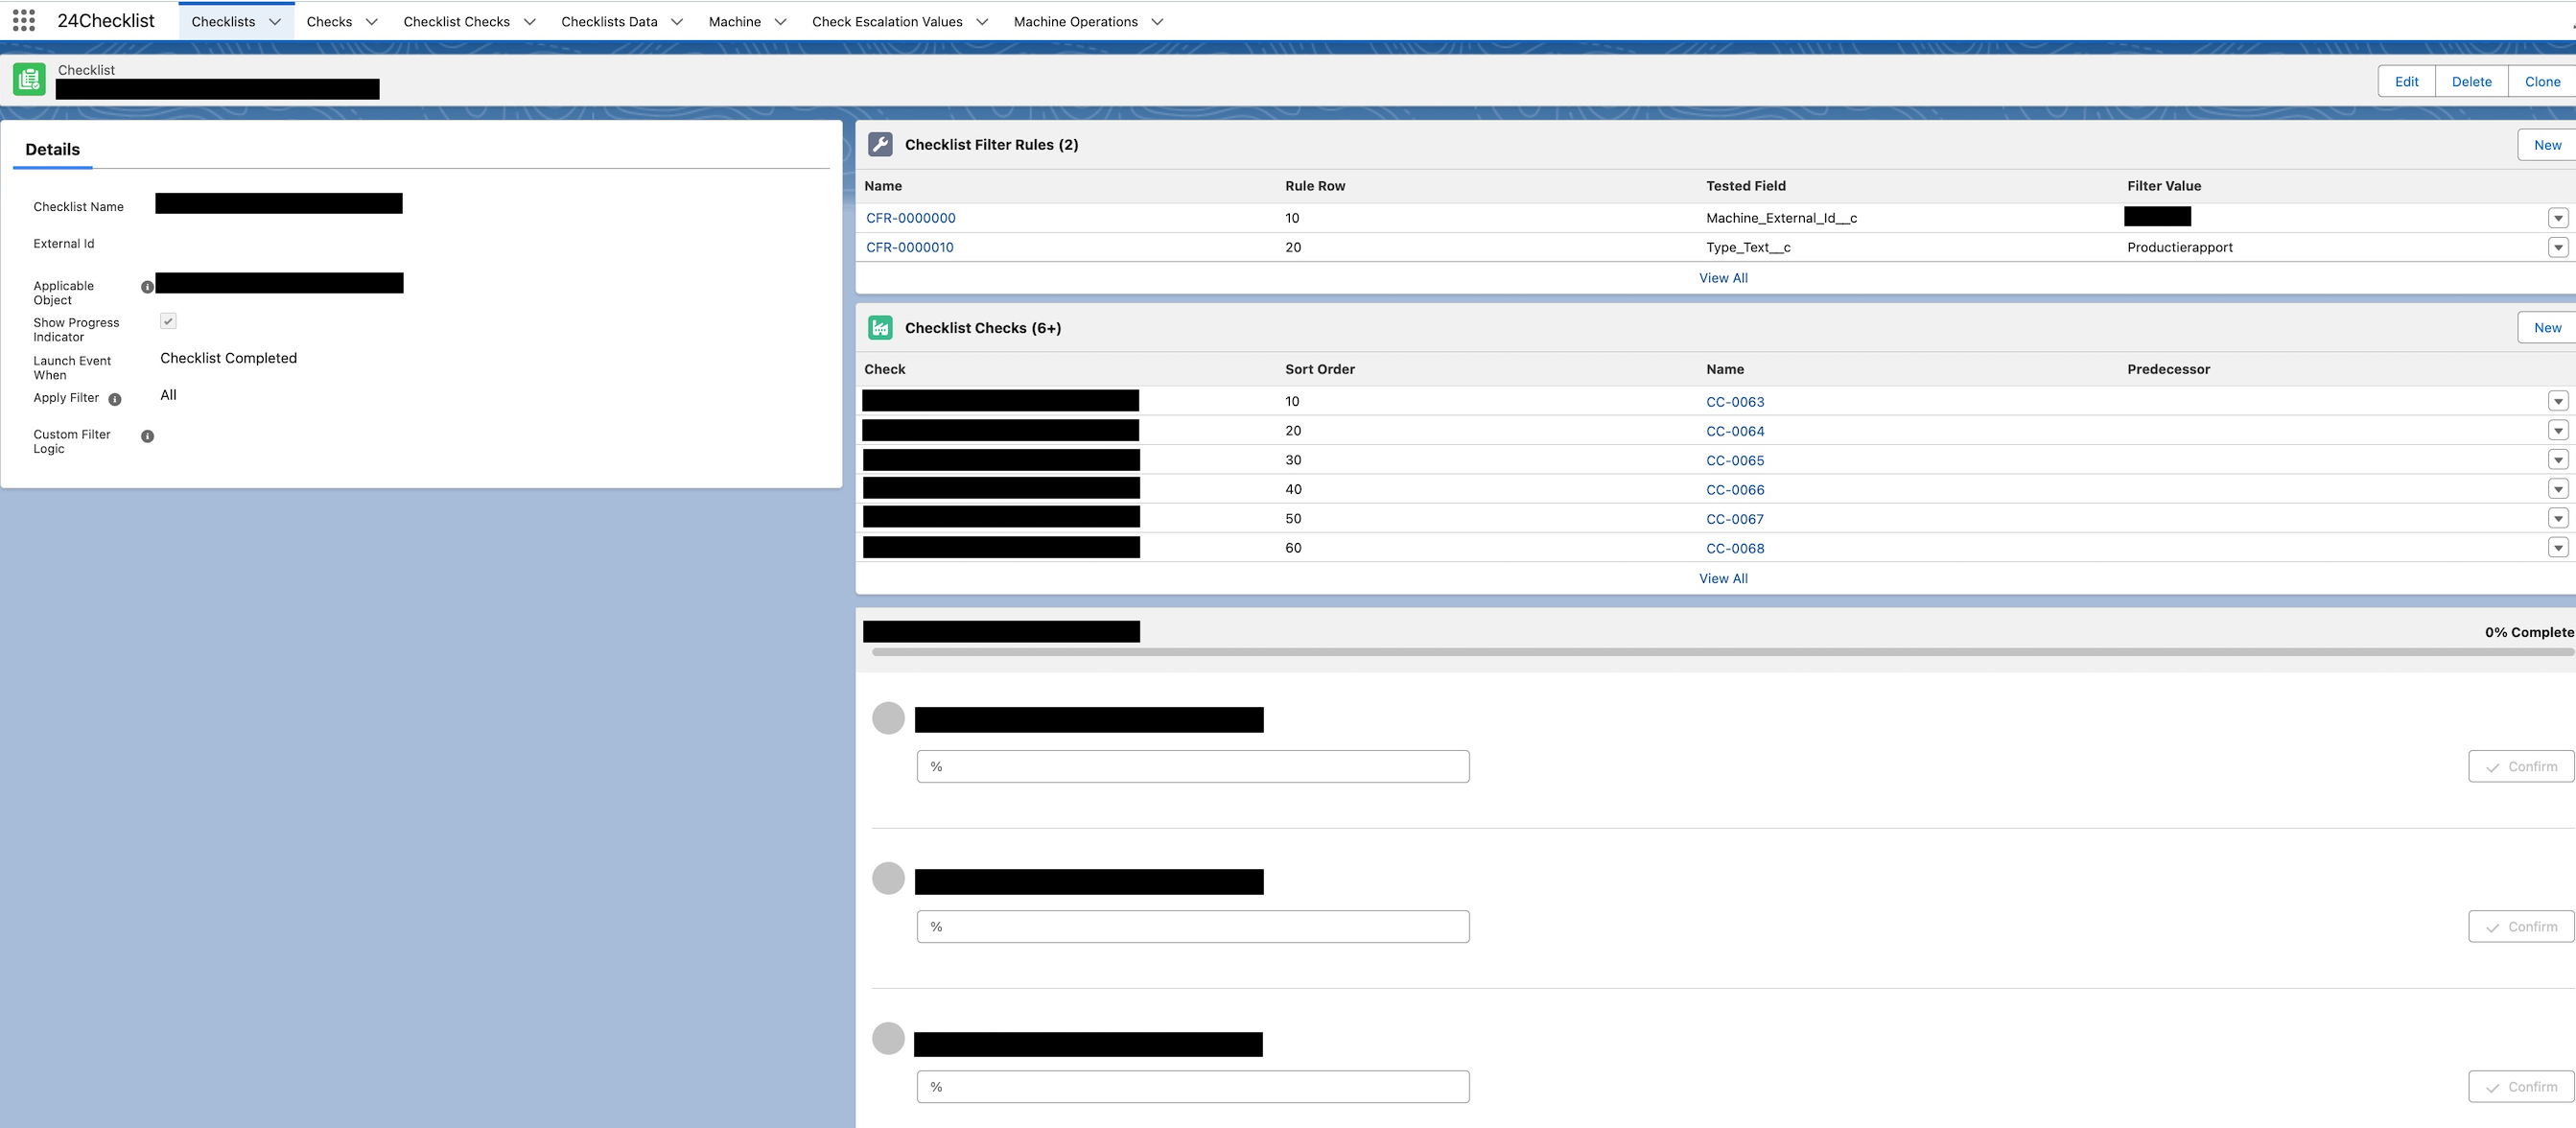
Once you have created one or multiple checks, you can create a checklist that groups these checks.
-
Checklist Name: Mandatory, name of the checklist.
-
External ID: Can be used to externally reference this checklist, e.g. in a Flow.
-
Applicable Object: Defines the Salesforce object onto which the checklist will be visible.
-
Show Progress Indicator: Check that decides whether to show a progress indicator when a user is completing the checklist.
-
Generate: Either On Load (when the record page gets loaded) or When Triggered. The latter allows you to be build a trigger flow using the Apex Method ‘Generate Triggered CheckResults’
apex-sfy24__GenerateTriggeredCheckResultsService. This can be a more flexible alternative to applying filter rules and can speed up the page loading when checklist results have been generated beforehand. -
Launch Event When: Launch a Salesforce Platform Event when the checklist has been completed.
-
Sort Order: In case you have multiple checklists on a record page, the sort order allows you to decide on the order in which these checklists are displayed. Lower sort order values come first.
-
Confirmation Mode: When set to individual check, then each check must be confirmed individually. When set to Complete Checklist, all checks can be confirmed at once.
When the confirmation mode is set to Complete Checklist, the following checks are NOT supported:
-
Generate x-times option on a check is not supported.
-
The concept of a predecessor check is not supported.
-
Timers that initiate upon confirmation of the predecessor are not supported.
-
Allow Undo Confirm: This setting is only applicable when the confirmation mode is set to individual. Users with the 24Checklist User - Feature Undo permission set can undo confirmed checks.
-
Show Confirmed By: Default for all checks on this checklist: show the confirming user after confirmation. In the check definition, you can choose to either inherit the setting from the checklist or explicitly define to Show or Hide the Confirmed By field on the checklist check record.
-
Show Confirmed On: Default for all checks on this checklist: show the confirmation time after confirmation. In the check definition, you can choose to either inherit the setting from the checklist or explicitly define to Show or Hide the Confirmed By field on the checklist check record.
This is an example how it looks like when the Confirmed By and Confirmed On options are enabled:

When a check is confirmed, users can now optionally see who confirmed it and when. Visibility can be configured at three levels.
Configuration levels
-
Checklist: sets the default behaviour for the entire checklist.
-
Check: sets it for every use of that Check record.
-
Checklist check: overrides the setting for a specific check on a specific checklist.
Resolution order (which takes priority? → most specific wins)
-
Checklist check: Show / Hide
-
Check: Used only if Checklist check is Inherit or blank
-
Checklist: Show Confirmed By / Show Confirmed On
Example
Checklist: Show Confirmed By = On
Check: Hide Confirmed By
Checklist check: Inherit
Result: Confirmed By is hidden because the Check setting applies.
-
Apply Filter: Filters can be used to decide whether a checklist should be shown to the user, based on a set of rules.
-
All: Apply all Checklist Filter Rules (see Checklist Filter Rules section below). If all Checklist Filter Rules are met, the checklist will be shown to the user.
-
Any: Apply any of the Checklist Filter Rules (see Checklist Filter Rules section below). If any of the Checklist Filter Rules are met, the checklist will be shown to the user.
-
Custom: Apply the Custom Filter Logic. If the Custom Filter Logic is true, the checklist will be shown to the user.
-
-
Custom Filter Logic: Only use when ‘Custom’ has been selected in Apply Filter. Determines under what conditions a Checklist should be presented to the user.
-
Create New Instances: When enabled, users assigned the 24Checklist User - Feature Create New Instance permission set can use the + New button to create another instance of the same checklist on the same record. This button is only shown to users who have that permission set.
-
Show All Instances: when checked users can see all instances of the checklist. The admin can configure sorting and filtering rules. When unchecked, only one instance of a checklist is visible, depending on the filter rules that were configured.
The below video illustrates how you can work with multiple checklists and multiple instances for a checklist.
24Checklist: Preview
The 24Checklist: Preview component has been added to the standard page layout of Checklist. It visualizes the current configuration of you checklist and related checks.
Please note that in order to use the preview you first need to assign checks to the checklist (via Checklist Checks) and potentially refresh your page.
Actions on Checklist: Activate, Deactivate, Publish, Create New Version
24Checklist supports a number of action buttons for the checklist, as shown in the figures below.
For yet to-be-published and activated checklists, it will look as follows:

For published and already activated checklists, it will look as follows:

Checklist Activation means that the Checklist is visible to end-users. After Checklist Deactivation, it is no longer visible to end-users. Activation and Deactivation are very handy during the development phase of new checklists. Activation and Deactivation are supported independent of whether version management has been enabled.
The concepts of publishing and activation are described in more detail in the section ‘Working With Checklist Version Management’ of this manual. Please consult that section for a better understanding of the behaviour.
The details of the checklist also show whether the checklist is activated or published.
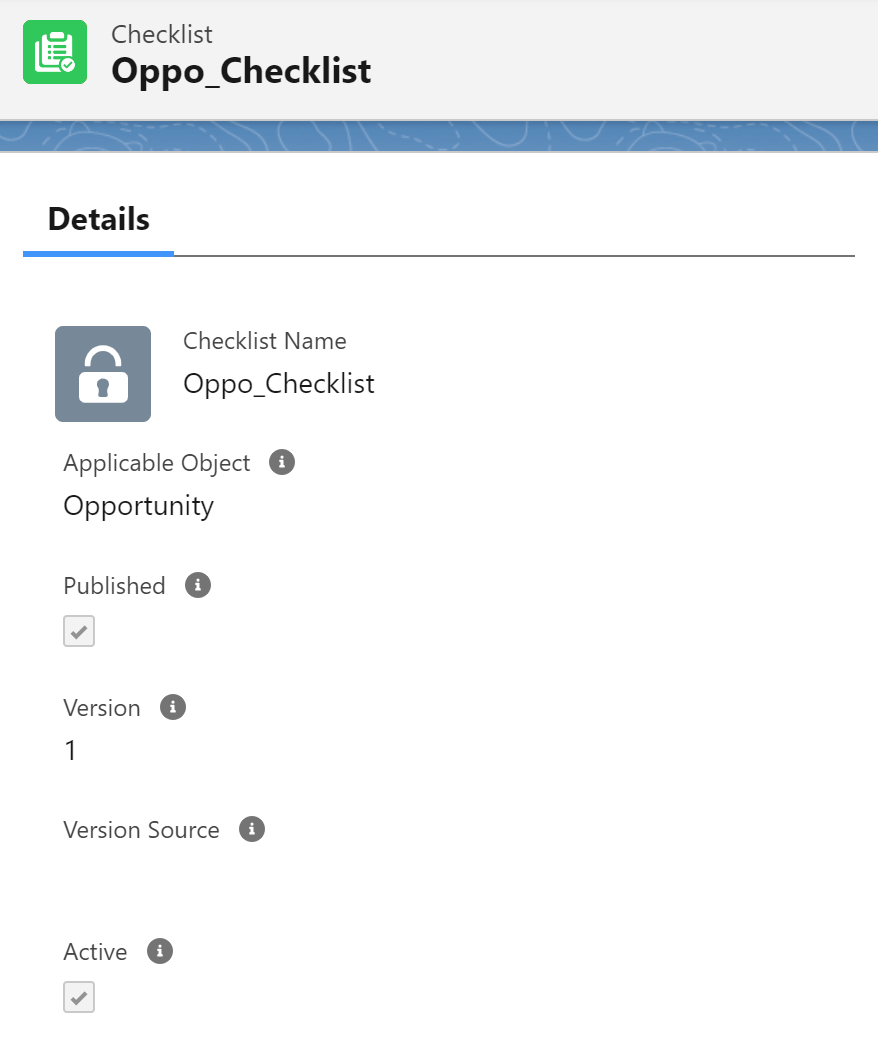
The lock indicates that the checklist has been published and cannot be altered anymore. In case you require changes, you have to create a New Version and the version number will be automatically increased. The version source, is the reference to the checklist from which this version was derived.